开始关注这个项目,是在百度飞桨上,项目地址:
https://aistudio.baidu.com/aistudio/projectdetail/6306271?channelType=0&channel=0
这个项目基于LangChain和大型语言模型系列模型,提供基于本地知识的自动问答应用,可以实现私有部署,正是我感兴趣的方向。
但飞桨上尝试了好多次,部署一直有问题,正好前面用过阿里云PAI平台,就试着在PAI上来部署这个项目。
第一,找到这个项目的Github地址:
https://github.com/chatchat-space/langchain-ChatGLM,仔细看了部署的要求,确认PAI应该没有问题。
阿里云PAI支持各种免费试用,通过支付宝登录,就可以在这里领取所需要的试用资源了:https://free.aliyun.com/?crowd=personal&pipCode=learn

阿里云PAI免费试用
试用有3个月的期限限制,且用且珍惜吧!
在PAI控制台中,进入DSW创建实例:

选择GPU规格(必定要选择支持资源组购买,不介意自掏腰包的除外):

选择ecs.gn6v-c8g1.2xlarge
镜像选择个Python3.9的吧:

镜像选择pytorch:1.12-gpu-py39-cu113-ubuntu20.04
创建实例后进入DSW,再进入Terminal:

DSW主界面
接下来,按照项目的安装文档说明进行安装:安装说明:
https://github.com/chatchat-space/langchain-ChatGLM/blob/master/docs/INSTALL.md
先检查环境:
/mnt/workspace/langchain-ChatGLM> python –version
Python 3.9.15
满足要求。
# 更新py库
$ pip3 install –upgrade pip
# 拉取仓库
git clone https://github.com/imClumsyPanda/langchain-ChatGLM.git
不得不说,比我本地clone快了不止一点点。有的时候从github clone会连接不上,不同时间多试几次吧。
# 进入目录
$ cd langchain-ChatGLM
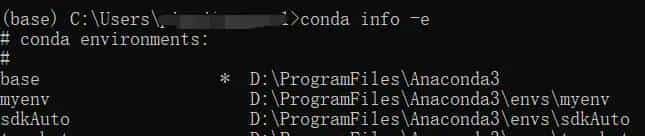
当前不是conda环境,所以用下面的方法来创建虚拟环境:
/mnt/workspace/langchain-ChatGLM> python -m venv venv
/mnt/workspace/langchain-ChatGLM> . venv/bin/activate
(venv) /mnt/workspace/langchain-ChatGLM>
完成后,命令行前面会有(venv)
检查冲突:
pip list |grep detectron2
没有,就不用uninstall了
Ubuntu环境不支持yum命令,用下面的方法来安装libX11,libXext
更新源
$ sudo apt-get update
sudo apt-get install libx11-dev libxext-dev
# 安装依赖(需要的时间比较长)
$ pip install -r requirements.txt
# 验证paddleocr是否成功,首次运行会下载约18M模型到~/.paddleocr
$ python loader/image_loader.py
也还是比较快的
执行 cli_demo.py 脚本体验命令行交互:
$ python cli_demo.py
显示的提示信息里有:A new version of the following files was downloaded from
https://huggingface.co/THUDM/chatglm2-6b-32k:
– quantization.py
所以用到了chatglm2-6b?
需要下载近15G的文档,所以需要的时间比较长(取决于服务器当时的网络环境,我测试时速度8M/s多一些)
下载过程中报错中止了,继续重复执行会接着前面的继续下载,Nice!
以下介绍来自于:
https://huggingface.co/THUDM/chatglm2-6b-32k
“ChatGLM2-6B-32K在ChatGLM2-6B的基础上进一步强化了对于长文本的理解能力,能够更好的处理最多32K长度的上下文。具体地,我们基于位置插值(Positional Interpolation)的方法对位置编码进行了更新,并在对话阶段使用 32K 的上下文长度训练。在实际的使用中,如果您面临的上下文长度基本在 8K 以内,我们推荐使用ChatGLM2-6B;如果您需要处理超过 8K 的上下文长度,我们推荐使用ChatGLM2-6B-32K。”
提示“Input your local knowledge file path 请输入本地知识文件路径:”,输入以下文件:
/mnt/systemDisk/langchain-ChatGLM/knowledge_base/samples/content/README.md
然后就可以通过人机对话的模式试用了,这个过程还比较顺利。
接下来体验Web交互就踩了不少坑了。
执行$ python webui.py,开始只输出一个本地链接,我远程的Ubuntu服务器,没有办法用本地浏览器访问呀!
通过DSW的IDE(不得不说有这个那比vi修改文件那是方便了不少),打开webui.py:

webui.py
将上面的语句改成:
(demo .queue() .launch(show_api=False,share=True,inbrowser=True))
再次运行python webui.py报错:
Could not create share link. Missing file: /mnt/workspace/langchain-ChatGLM/venv/lib/python3.9/site-packages/gradio/frpc_linux_amd64_v0.2.
Please check your internet connection. This can happen if your antivirus software blocks the download of this file. You can install manually by following these steps:
1. Download this file: https://cdn-media.huggingface.co/frpc-gradio-0.2/frpc_linux_amd64
2. Rename the downloaded file to: frpc_linux_amd64_v0.2
3. Move the file to this location: /mnt/workspace/langchain-ChatGLM/venv/lib/python3.9/site-packages/gradio
Ok,解决步骤都有了,那就:
/mnt/workspace/langchain-ChatGLM>cd venv/lib/python3.9/site-packages/gradio
wget https://cdn-media.huggingface.co/frpc-gradio-0.2/frpc_linux_amd64
mv /frpc_linux_amd64 frpc_linux_amd64_v0.2
重新启动继续报错:Could not create share link. Please check your internet connection or our status page:
https://status.gradio.app.
这个错误耽误了我许多时间,最后还是在网上找到了解决办法:
chmod +x /mnt/workspace/langchain-ChatGLM/venv/lib/python3.9/site-packages/gradio/frpc_linux_amd64_v0.2
接下来,就是见证奇迹的时刻了:

gradio临时域名界面
这还是只是初步跑通,要能真正用起来,还有许多细致的工作要做。即使这样,也是各种踩雷,需要不断去摸索解决。
感觉下来,阿里云的PAI的确 不错,几天不见,之前Terminal环境不能复制内容、无法使用上箭头重复前面的命令等问题都解决了。而且我验证用的这个机器,要29块多一个小时,这个羊毛薅起来感觉真不错!

LangChain + ChatGLM处理示意图
© 版权声明
文章版权归作者所有,未经允许请勿转载。
相关文章


收藏了,感谢分享