
Unity与Vue3通信交互
在 Web 项目开发中,常常会对通过 Unity 编写的虚拟现实或者数字孪生项目进行 WebGL 发布,然后嵌入到 Web 项目中展示 3D 效果。在这样的项目中,不免会出现 Web 项目 与 Unity WebGL 的交互。
解决方案:
1.Unity 项目通过 jslib 脚本调用 web 页面中的方法。
注:
在项目中使用浏览器 JavaScript 的提议方法是将 JavaScript 源代码添加到项目中,然后直接从脚本代码中调用这些函数。为此,请使用 .jslib 扩展名将包含 JavaScript 代码的文件放置在 Assets 文件夹中的“Plugins”子文件夹下。插件文件需要有如下所示的语法:
mergeInto(LibraryManager.library, {


});
如:
mergeInto(LibraryManager.library, {

  Hello: function () {
    window.alert("Hello, world!");
  },

  HelloString: function (str) {
    window.alert(UTF8ToString(str));
  },

  PrintFloatArray: function (array, size) {
    for(var i = 0; i < size; i++)
    console.log(HEAPF32[(array >> 2) + i]);
  },

  AddNumbers: function (x, y) {
    return x + y;
  },

  StringReturnValueFunction: function () {
    var returnStr = "bla";
    var bufferSize = lengthBytesUTF8(returnStr) + 1;
    var buffer = _malloc(bufferSize);
    stringToUTF8(returnStr, buffer, bufferSize);
    return buffer;
  },

  BindWebGLTexture: function (texture) {
    GLctx.bindTexture(GLctx.TEXTURE_2D, GL.textures[texture]);
  },

});
其中的方法为 Unity 项目中 C# 调用的方法。C#为我们提供了这个命名空间
System.Runtime.InteropServices下的DllImport方法,允许引入非托管代码程序集,也就是说我们在Unity里可以通过DllImport方法调用外部程序集的方法。如:
using UnityEngine;
using System.Runtime.InteropServices;

public class NewBehaviourScript : MonoBehaviour {

    [DllImport("__Internal")]
    private static extern void Hello();

    [DllImport("__Internal")]
    private static extern void HelloString(string str);

    [DllImport("__Internal")]
    private static extern void PrintFloatArray(float[] array, int size);

    [DllImport("__Internal")]
    private static extern int AddNumbers(int x, int y);

    [DllImport("__Internal")]
    private static extern string StringReturnValueFunction();

    [DllImport("__Internal")]
    private static extern void BindWebGLTexture(int texture);

    void Start() {
        Hello();

        HelloString("This is a string.");

        float[] myArray = new float[10];
        PrintFloatArray(myArray, myArray.Length);

        int result = AddNumbers(5, 7);
        Debug.Log(result);

        Debug.Log(StringReturnValueFunction());

        var texture = new Texture2D(0, 0, TextureFormat.ARGB32, false);
        BindWebGLTexture(texture.GetNativeTextureID());
    }
}
2.Web 页面通过 SendMessage 方法向 Unity 发送消息。
需要从浏览器的 JavaScript 向 Unity 脚本发送一些数据或通知。提议的做法是调用内容中的游戏对象上的方法。如果要从嵌入在项目中的 JavaScript 插件执行调用,可使用以下代码:
unityInstance.SendMessage('场景中挂载脚本的物体名','方法名');
unityInstance.SendMessage('场景中挂载脚本的物体名','方法名','方法对应参数');
下面以一个简单的 Demo 来演示 Unity WebGL 与 Web 之间的交互方法,示例效果:

功能:
1.点击页面上的“打开”按钮后,弹出窗口中显示 Unity WebGL;
2.在 Unity WebGL 中显示一个立方体,根据页面上的操作按钮,WebGL 中的立方体可以显示或隐藏,也可以改变颜色;
3.WebGL 中的立方体显示或隐藏、改变颜色后返回消息,页面弹出显示返回的消息;
4.在 WebGL 中,当单击鼠标或者按下空格的时候,返回消息,页面弹出显示返回的消息;
1.Unity项目
项目中的物体:
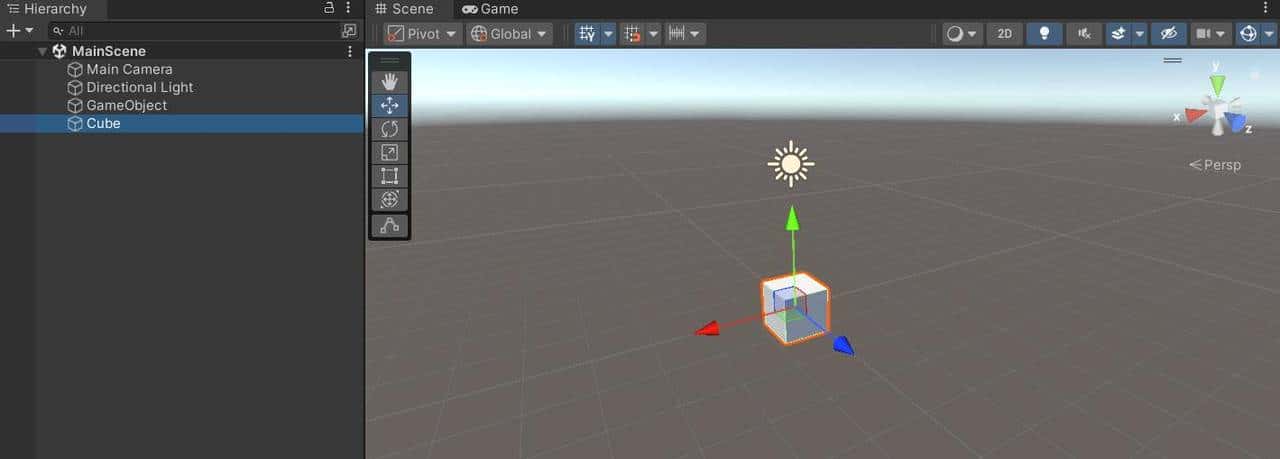
1.Cube – 要操作的对象
2.GameObject – 空物体,用于挂载脚本(MainScript.cs)
3.在 Assets 中创建目录 Plugins,在该目录下创建 webgl.jslib,内容如下:
mergeInto(LibraryManager.library, {
    ShowMessage: function (str) {
        var tip = UTF8ToString(str);
        // web 页面中定义的方法
        showMessage(tip);
    },
});
MainScript.cs
using System.Collections;
using System.Collections.Generic;
using System.Runtime.InteropServices;
using UnityEngine;

public class MainScript : MonoBehaviour
{
    public Transform cube;

    [DllImport("__Internal")]
    private static extern void ShowMessage(string msg);//方法名需要jslib书写一致

    // Start is called before the first frame update
    void Start()
    {

    }

    // Update is called once per frame
    void Update()
    {
        if (Input.GetMouseButtonDown(0))
        {
            ShowMessage("按下了鼠标左键!");
        }

        if (Input.GetKeyDown(KeyCode.Space))
        {
            ShowMessage("按下了空格键!");
        }
    }

    // 设置立方体的可见性
    public void SetVisible(string value)
    {
        // 调整立方体的大小
        // cube.localScale = value == "0" ? Vector3.zero : Vector3.one;
        if (value == "0")
        {
            cube.localScale = Vector3.zero;
            ShowMessage("已隐藏!");

        }
        else
        {
            cube.localScale = Vector3.one;
            ShowMessage("已显示!");
        }
    }

    // 设置立方体的颜色
    public void SetColor(string htmlColor)
    {
        // 将 HTML 颜色值转换为颜色
        if (ColorUtility.TryParseHtmlString(htmlColor, out Color color))
        {
            // 设置立方体的材质验收
            cube.GetComponent<MeshRenderer>().material.color = color;
            ShowMessage("颜色已设置!");
        }
    }
}
4.编译为 WebGL
2.Vue项目
通过 iframe 打开 WebGL,然后通过 postMessage 发送消息。
1.将 Unity WebGL 编译好的内容复制到 Vue 项目的 public 目录下的 unity 目录(创建 unity 目录);
2.修改 WebGL 编译后的 index.html,增加如下代码,用于接收 WebGL 返回的消息,并发送到父页面:
function showMessage(msg) {
    window.parent.postMessage(msg);
}
3.Vue 项目中新建组件 Unity3d.vue,通过 iframe 打开 WebGL 并接收消息后弹出显示;
<script setup>
import {onMounted, ref} from "vue";

const visible = ref(false);
const msg = ref("");

onMounted(() => {
  window.addEventListener('message', (event) => {
    console.log('Received message from iframe:', event.data);
    msg.value = event.data;
    visible.value = true;
  });
});
</script>

<template>
  <iframe id="unityFrame" src="/unity/index.html" width="1000" height="700" style="border: none;"></iframe>

  <el-dialog
      v-model="visible"
      title="来自Unity的消息"
      width="600"
      align-center
  >
    <span>
      {{ msg }}
    </span>
    <template #footer>
      <div class="dialog-footer">
        <el-button @click="visible = false">撤销</el-button>
        <el-button type="primary" @click="visible = false">
          确定
        </el-button>
      </div>
    </template>
  </el-dialog>
</template>

<style scoped>

</style>
4.修改 WebGL 编译后的 index.html,增加如下代码,用于接收 Vue 项目(父页面)发送的消息,并发送到 Unity:
var uInstance = null;
window.addEventListener('message', (event) => {
console.log('Received message from parent:', event.data);
if (uInstance === null) return;
if (event.data === "0"){
uInstance.SendMessage('GameObject', 'SetVisible', "0");
}
if (event.data === "1"){
uInstance.SendMessage('GameObject', 'SetVisible', "1");
}
if (event.data.startsWith("#")){
uInstance.SendMessage('GameObject', 'SetColor', event.data);
}
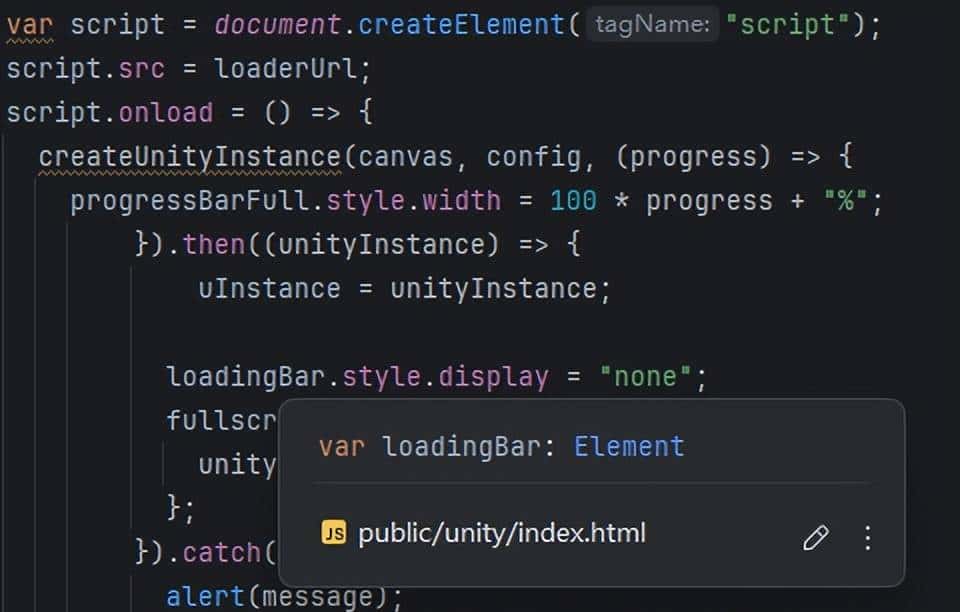
});修改 index.html 中代码增加:uInstance = unityInstance;
5.在 Unity3d.vue 组件中增加发送消息的按钮和方法:
按钮:
<div>
    <el-button @click="show_button_clicked">显示</el-button>
    <el-button @click="hide_button_clicked">隐藏</el-button>
    <el-button type="primary" @click="blue_button_clicked">Blue</el-button>
    <el-button type="success" @click="green_button_clicked">Green</el-button>
    <el-button type="danger" @click="red_button_clicked">Red</el-button>
  </div>
方法:
function show_button_clicked(){
const iframe = document.getElementById('unityFrame');
iframe.contentWindow.postMessage('1');
}
function hide_button_clicked(){
const iframe = document.getElementById('unityFrame');
iframe.contentWindow.postMessage('0');
}
function blue_button_clicked(){
const iframe = document.getElementById('unityFrame');
iframe.contentWindow.postMessage('#0000ff');
}
function green_button_clicked(){
const iframe = document.getElementById('unityFrame');
iframe.contentWindow.postMessage('#00ff00');
}
function red_button_clicked(){
const iframe = document.getElementById('unityFrame');
iframe.contentWindow.postMessage('#ff0000');
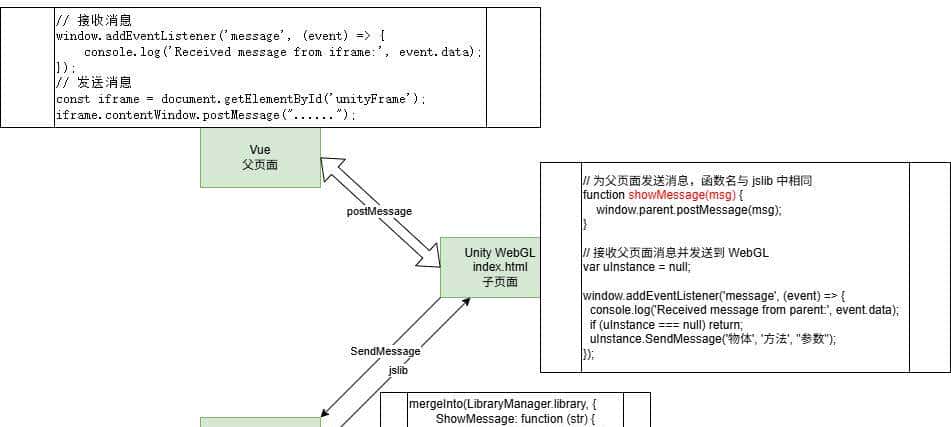
}3.总结
如下图:
© 版权声明
文章版权归作者所有,未经允许请勿转载。
相关文章


暂无评论...